
Web Hosting Service
 In the past, I have usually had university-hosted websites. So selecting a hosting service has never been an issue for me. A few years ago, though, Ferris stopped offering disk space to faculty for our websites. As a stop-gap, I initially set up a set on GoDaddy and bought a domain name: franklund-micro.com. That worked OK, but I really wanted more control over the site, the ability to use markdown to author new content, and the flexibility to host some data science apps to use with my new Chromebook. As I began searching for my next host, three factors were key for me:
- Simplicity - I’m a geek, but many other things vie for my time. I do not have the time to become a network administrator on the side. I wanted something easy to configure, deploy, and maintain.
- Cost - I do not want to spend a ton on this side project. However, I would like the ability to scale the web service up or down as my needs change.
- Support - Having a ton of tutorials and blog posts from others is crucial for me. I tend to figure things out by breaking things one-at-a-time. These support files are necessary for me to get what I’ve broken working again.
There are a lot of hosting services out there. But DigitalOcean really ticked all the boxes for me. For just $5.00 per month, I have a 1 processor Ubuntu 16.04 server (which they call a droplet) with 1Gb of RAM and 25 Gb of drive space. This is sufficient to run this site and it’s attendent blog as well as all the data science apps described below. I can also scale this droplet up (with more processors and/or RAM) during times of heavier use. You can try it too with no risk. If you click the button below and set up your own droplet, you will get a $10 referral credit. That is enough to run your own droplet for two months for free. I encourage you to give it a try. The tutorial that I used for setting up my droplet can be found here.
Web Server Platform
 With my hosting service selected and set up, the next step was to choose a server platform. For me the choice boiled down to either Apache or Nginx. In the end, I chose the latter. Most of what I plan to use this droplet for are static in nature. In addition, I needed a server that could work on the minimal resources that I am willing to pay for. This are strengths for Nginx. Apache is arguably more versatile and powerful. I just don’t need those abilities right now. The instructions that I used for setting up Nginx can be found here. Once I had Nginx up and running, I set up https using Let’s Encrypt as described here. I also set up port forwarding for all of my data science applications. I plan to post a blog article about that later.
Document Processing
 I am quite comfortable writing web code in HTML, XML, and PHP. However, for everyday use, nothing can beat simple Markdown documents. I have used Jekyll to build my static site from a series of Markdown text files. I first met (and loved) Jekyll when I started to use GitHub. This site also leverages the power of liquid tags and Bootstrap to simplify complex HTML calls as a series of template files. I build and maintain this site on my MacBook Pro (which my wife calls “the other woman - that can’t be good, can it?). That way, I can simple run
 jekyll serve in the terminal and view a development copy of my changes by browsing to 127.0.0.1:4000. I have set up my droplet as described here. This has the advantage that my entire site is under version control, and I can post any committed changes to my production site by simply typing git push droplet master in the terminal.
Website Template
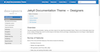 Once I had Jekyll up and running, the next item on my agenda was to find a good site template. I really wanted a topnav panel and a left navigation bar with collapsible menus. I also wanted the template to be fairly simple to implement and modify using nothing more than Jekyll and Bootstrap. After hunting for quite a while online, I stumbled across the Documentation Theme for Jekyll by Tom Johnson. The instructions for using the theme is part of the site itself. This is a wonderful resource and I have not even managed to tap half of its potential yet. Although he designed this project to write product documentation, I have found it pretty easy to modify into a personal static website. Over time (and as time permits) I plan to slowly disassemble and modify this template to create a more customized look for my site. As it is, though, I still think it looks pretty darn good.
Search Engine
 The Documentation Theme for Jekyll comes with its own simple search engine - and it works just fine out of the box. The search essentially indexes all of the summaries, key words, tags, and titles on the pages in your site. I prefer a more robust and responsive search. The search engine that I really like is from Algolia. This search works as a Jekyll plug-in and its installation is described here. Indexing my site is as simple as typing
 jekyll algolia push from the command line. Algolia indexes all of the site content and the search results are shown as soon as the first letter is typed in the search field. Algolia is also tolerant of typos. It took me a bit to get Algolia integrated into the template, but I am very happy with how it functions now that it is.
Data Science Apps
One of my main drivers for setting up this droplet in the first place was a need for web-available data science applications. I had purchased a Chromebook, and wanted to use it for data analysis in a manner similar to Jeff Leek. I have accomplished what I set out to do. At this point, I often forgo my MacBook Pro altogether and do my data analysis on my Asus C302 (which my wife calls “the little woman” - still not good, right?). Access to all of these applications is afforded by the topnav panel of this site.
RStudio Server
My first order of business was to get R and RStudio Server installed on my DigitalOcean droplet. For this, I followed the excellent instructions of Dean Attali in his post entitled How to get your very own RStudio Server and Shiny Server with DigitalOcean. This all worked without a hitch.
Shiny Server
I also set up a Shiny Server using Dean Attali’s instructions (see above). This enables me to share dynamic documents and shiny applications on the web.
Jupyter Notebooks
Dynamic reporting of data analyses can also be accomplished using Python. Jupyter Notebooks allow me to embed analysis code into the report document itself (just like I can do in an RMarkdown file in RStudio. I prefer Jupyter Notebooks for smaller projects and for instruction. I installed this using the instructions posted here. Once I had the notebooks running, I added kernels for Python 2, Python 3, R, and Octave. This enables me to write and execute code in all the languages that I care most about.
OpenRefine
OpenRefine can be very handy for cleaning up messy datasets. I followed the instructions here to install it. I was afraid that it would not run on my very modest droplet. However, it fires up just fine and has handled a few small data sets that I have tried.
EtherPad
As a final experiment, I also installed EtherPad on my droplet. The instructions for this process are available here. I learned of EtherPad when training as a DataCarpentry instructor. These wikis allow collaborative work on various projects. I still prefer Google Docs for most applications. However, I think that I may use EtherPads when teaching Reproducible Research in our Biology curriculum.